Friday, June 09, 2017

Flakvierling 38 auf PzIV sfl (aka Mobelwagen prototype)

Sometimes weird ideas pop into mind.  This project is intended to be a kit-bash of the old (alte?) Tamiya Mobelwagen with the 20mm Flakvierling 38.  As it turns out, there apparently was a single prototype built in 1943.  While the Mobelwagen concept was approved, for production the 37mm Flak 43 replaced the 20mm Flakvierling.  There are a few pictures of the 20mm Flakvierling armed prototype - but none in combat.  Some sources indicate that the prototype may have been re-armed with a 37mm FlaK and thus probably never saw combat - at least armed with the 20mm Flakvierling.  The prototype will be referred to herein as a "Mobelwagen" even if, perhaps, that term was not used to refer to the prototype, because "20mm Flakvierling 38 auf Fahrgestell Panzerkampfwagen IV Selbstfahrlafette" is just too long.

Tamiya has an old kit of the 20mm Flakvierling prototype as well as a newer version of the production 37 FlaK 43 Mobelwagen.  The older version is based on Tamiya's old PzIV hull from the 1970s which has various issues.  The new version uses the updated PzIV hull.

So, the idea is to mate the Tamiya kit with a (somewhat) updated Dragon PzIV hull - specifically, the hull from a spare Cyber-Hobby "Orange Box" Brummbar late kit, which was selected as the donor because of its low cost (and, with a new Tamiya kit coming, a low likelihood of being built as such).

The two hulls are shown below:
Because the fenders in the middle of the Mobelwagen hull lack the tread plate, the fenders need to be retained.  After the initial surgery:

First roadblock - a problem that should have been evident before but is obvious from the overlay is that the Mobelwagen fenders are wider than the DML fenders.  The option of cutting off and relocating inwards the Mobelwagen fenders, while probably the most correct solution, seems to pose significant execution risks of creating gaps, etc., and because there are various attachment points, etc., located on the fender.  Trimming the Mobelwagen fenders is likely problematic because of the rivets located at the edge.  A third option might be to widen/extend the DML fenders - maybe by adding a strip along the outer edge.  This might be the easiest to execute, although technically probably the least correct.


Okay, decided to go with option 1.  Ended up having to fill quite a number of gaps as well.


After replacing dampers with Tristar early dampers and adding sides:


The Tamiya kit FlakVierling partially fitted on a preliminary basis.  Will need replace gun sight and barrels - not sure whether to replace in entirety. 


At left is a partially assembled Flakvierling 38 from the DML Wirbelwind kit (originally from the Sd.Kfz. 7/1) (note round base), while the partially assembled Tamiya Flakvierling 38 is at right.


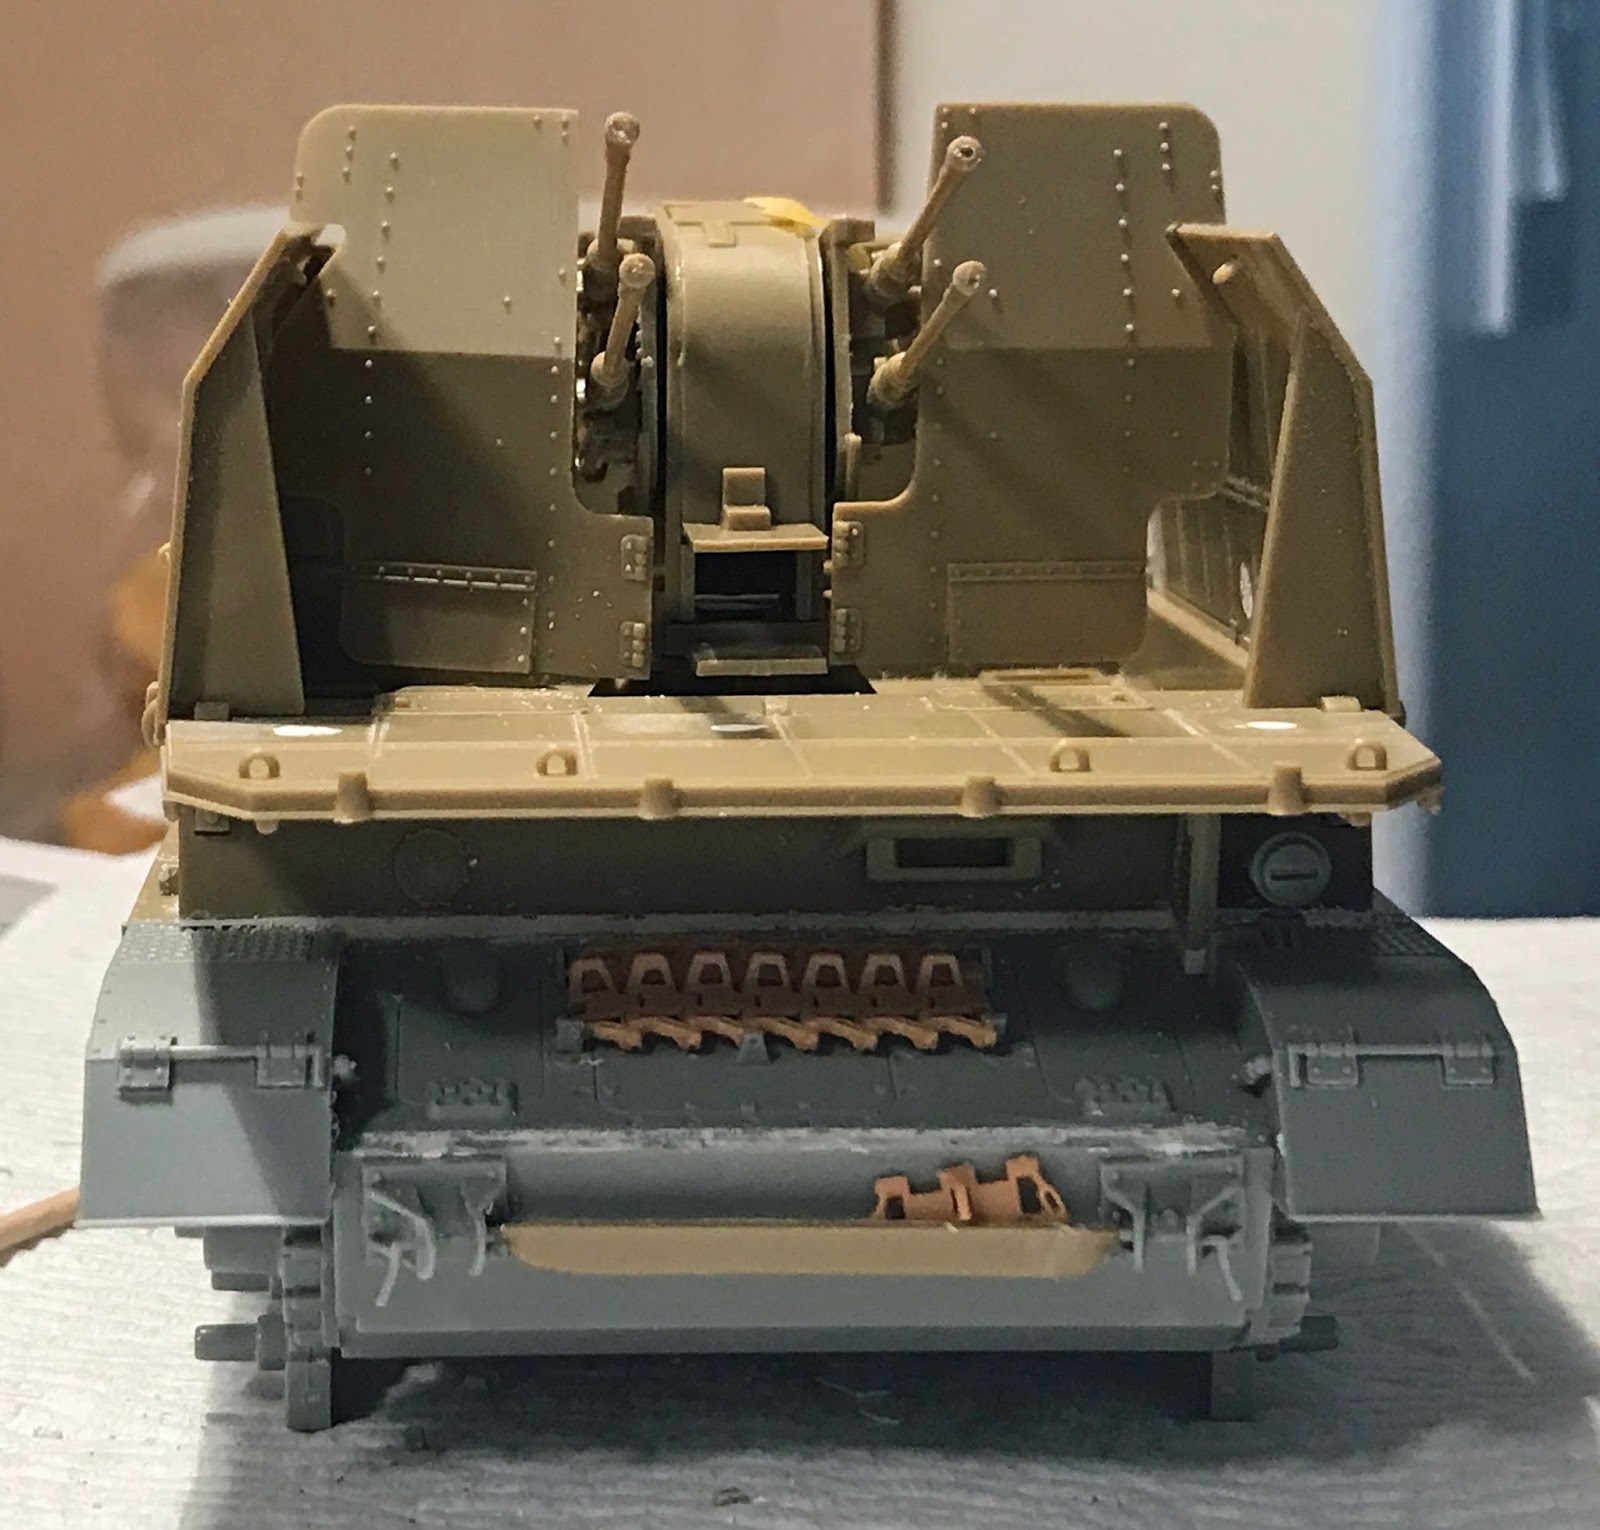


A little bit of primer just to get a little more unified feel to the build


As can be seen from the above picture, the shields on the AFV Club Flakvierling 38 are much wider than the Tamiya shields and extend well beyond the side walls of the Mobelwagen so the option of using these shields with only minor modifications won't work.  Additionally, the Tamiya Mobelwagen shields will not easily fit perpendicularly with the AFV Club base, so using the AFV Club Flakvierling may be out as an option.


Finally getting to the final configuration.  The kit flakvierling is used with some minor detailing.  Still need to find a replacement gun sight, but that can be added later.  Now it mainly a matter of painting.  Road wheels and tracks (from Tristar) have been painted and are ready for adding.  We'll see if the Tristar tracks hold together without glue.

Sunday, May 21, 2017

120mm Granatwerfer 42 kitbash

A mash-up of the Zvezda and DML 120mm GrW. 42.  From what I can tell, the Zvezda is actually the Soviet 120mm m.1938 (of which many were captured and used by the Germans).  One obvious difference is the sight.  Also, horizontal adjustment mechanism is a knob on the GrW. 42, but a crank on the m. 1938.  Both the Zevezda and DML have a crank.  A good reference is a US army film demonstration of the deployment of a capture GrW 42 - easily found online.


The trailer also is the Soviet version.  Have tried to modify the trailer slightly, esp. at towing hook which consists of spare parts from the Tristar 20mm FlaK 38 (although it should be bent).  The lower vertical cross bar probably should be deleted.  Based on reference photos, the cart wheels also should be replaced w/something like Opel Blitz/Steyr 1500 wheels.  The (temporary) wheels shown are Hussar Productions flak trailer wheels.  To fit the DML mortar base plate, the portion of the trailer where the base plate hooks on had to be thinned.  Also, the Soviet trailer supports appear to have been more angular than the German trailer and so there was some slight rounding.

The towed mortar is the Zvezda tube and folded legs, with everything else from the DML, plus the horizontal adjustment crank replaced by a knob (from a spare rear mg mount from a DML 250 or 251) and a cross bar with a holding pin (part of the aforementioned spare rear mg mount).  The deployed mortar (Soviet) is the DML tube and legs (and replacing the Zvezda vertical crank with the now-redundant horizontal crank from the DML kit), with everything else from Zvezda.


Friday, March 10, 2017

AFV Club SdKfz 11/4 WIP

The AFV Club SdKfz 11/4 has been under construction for a long time now.  Completion has been stymied by (i) some gaps between the door/side panels and the hood and cab; (ii) the ugly folded tilt which needs some sort of covering, etc.  Bought the AFV Club SdKfz 11/251 individual track links to replace the kit tracks but installing the track links under the fender proved infeasible.  Next alternative was the kit tracks, which actually aren't bad and are a lot easier to use than the AFV Club indie track links.  Used clear fishing line to tie them down for a "sag" effect.  However, decided to use an "extra" set of DML EZ Tracks for the Sd.Kfz. 251 as described below.


Top - WIP AFV Club SdKfz 11/4 with ICM Pak 36(r); bottom - WIP 11/4 with Dragon Sd.Kfz. 251 individual link tracks.

After three years hiatus, will try to finish off this kit.  Three roadblocks so far:

1.  The doors of the cab do not fit squarely with the hood.  Not sure what the issue is - the assembly seems to have followed the instructions.  Finally decided to cut off the locating pins on the underside of the engine hood and fill the gaps in the chassis, insert some shims and putty in the remaining gaps between the doors and hood (and also between the doors and bottom of cab.  Not pretty, but not sure what else to do.  See bottom picture (above).

2.  Replacing rubber band tracks with so-called EZ Tracks from DML Sd.Kfz.251.  These are the pressed type, but not necessarily EZ to assemble.  The skeletal tracks in the DML kit, although requiring removal from the sprues were much easier to assemble and remained flexible.  The EZ tracks seem to have shallower attachment pins/points, which made assembly more difficult and meant that they don't stay flexible.  Also ended up having to cut-off and remove the well-glued AFV drive sprocket because it was misaligned with the road wheels.  I think the issue is the drive sprocket is too thick.  Replaced with a DML drive sprocket from an Sd.Kfz. 251 after making a replacement "axle" from sprue.  I like the look of the DML tracks better than the AFV Club individual track links for SdKfz 11/251, whose track pads seems skinny in comparison to the DML tracks.  See bottom picture (above).

3.  The tilt looks flat and not particularly realistic - not sure how to handle yet - most other pics of this build show it covered up in whole or in part to various degrees.

Friday, February 17, 2017

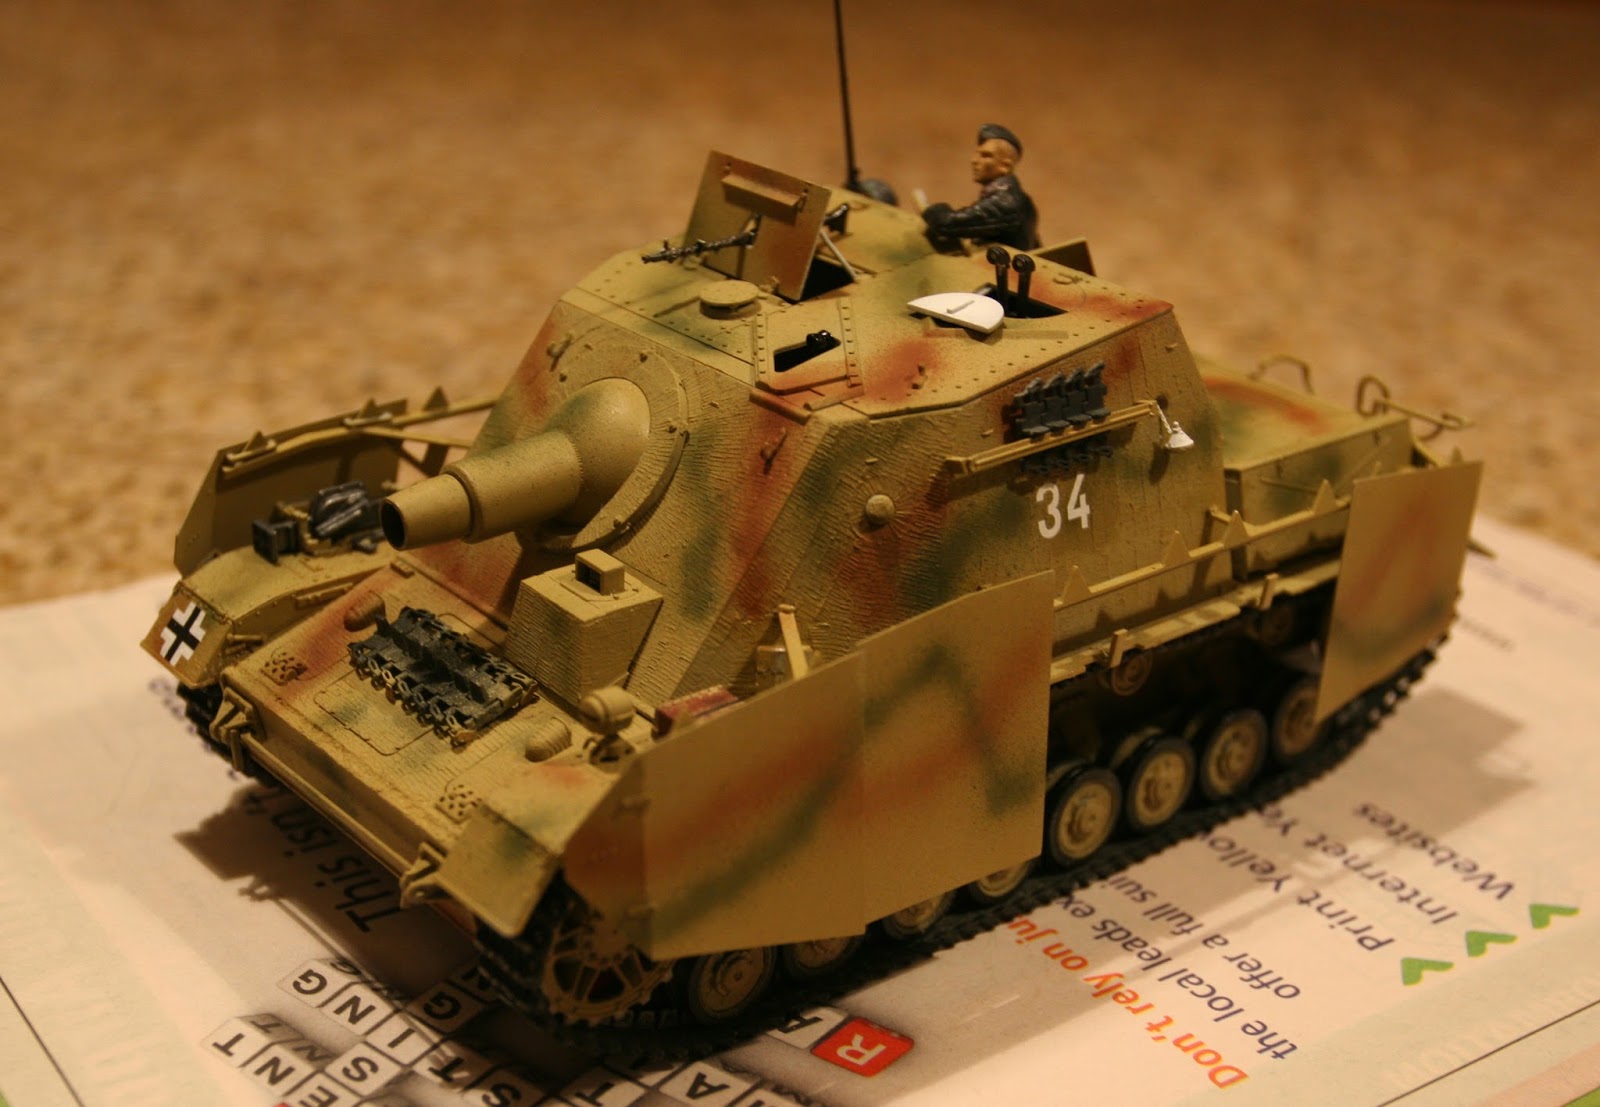
DML Sturmpanzer IV mid mit zimmerit

After a long hiatus, some progress on the Dragon Sturmpanzer IV "Brummbar" middle version mit zimmerit.  Substituted some extra "magic" link to link tracks for the DS runs.  As others have noted, the gun assembly sits too high and prevents the casemate from sitting flush on the lower hull so the bottom part of the gun base had to be shaved down fairly substantially.  The driver's box still seems to be a little high, so may need to remove locating pins so it is flush with lower hull.  Small gap at front of lower hull needs a little filling but otherwise generally very good fit (except for gun as noted above).  Intend to finish as vehicle of Sturmpanzer Abt. 217 which fought in France in late summer 1944.  Pictures indicate a spare track rack was added to each side of the superstructure.  The camo scheme is a little unclear from the couple of pics of (destroyed) vehicles from this unit.

A couple of WIP pictures:


Thursday, February 09, 2017

Krupp protze mit Flak 30 - WIP

The old Tamiya Krupp Protze kit being converted to a carrier for the 20mm Flak.  Initial intent was to mount a Flak 38, although, based on pictures (and early war time frame of introduction), the 20mm Flak 30 probably was more commonly used than the Flak 38.  However, there is photo of a late war Krupp Protze with a drilling mount and at least one photo of a Krupp Protze with a Flak 38, so it would not completely be a "paper" project.  Temporarily used the Tamiya Flak 38 for fitting purposes, but plan was to replace with the Tristar Flak 38 late.  Have the original Tristar boxing but recently was reissued by Hobby Boss.  Based on initial build, seems to be a nice kit but heavy sprue gates and there was one point on the trailer in which the mold seems not to have filled in.  Drilled out the holes on the flash suppressor.  Wanted to use the Tristar kit because it comes with a nice ammo trailer (although query whether the Krupp Protze would have had sufficient power to both portage the flak gun and tow a fully loaded ammo trailer).  The base for the Flak mounting is built from tongue depressors.


Roadblocks:  Every kit, it seems, has some "roadblocks" - stumbling points that can impede an otherwise smooth build.  Some kits have more than others.

For the Tristar Flak 38 late, the top three (3) roadblocks, so far:

1.  If installing the gun shields, hold off on installing the top shield supports until installing the shields.  The instructions have you install them early.  If you're lucky, they will align with the shield.  If you're not, like me, you will have a problem.  Because the supports are solidly glued to the frame, will have to cut them from their base, do a little surgery, and try to fit properly.

2.  The gun sight link is attached w/o glue to a PE part then trapped in the gun  so it can freely rotate.  Seems like a nice idea but the attachment pin is very shallow.  Against my better judgment, I tried this and, sure enough, the link came loose from the now-inaccessible PE part.  So will have to try to glue in the approximately correct location. Best solution would be some sort of nut on the other side of the attachment point, but probably too shallow.  Maybe just attach with white glue (?) before trapping.  Good idea, perhaps, but falls down in execution.

3. This roadblock is specific to intended use as a portee on the krupp protze - while the Tamiya Flak 38 fits (barely), the Tristar Flak 38 does not.  The Tristar gun base (or the supporting feet) is slightly wider than the Tamiya gun base - not by a lot, but by enough to prevent it from fitting straight into the back of the krupp protze.  This roadblock could be fatal - at least to the intended use.

Some other notes - should insert the other half of the towing pin when attaching the ammo box to the sd ah 51 frame - easier to do before, but still possible afterwards.  Also, for those allergic to PE, there are a number of very tiny PE parts that have to be no added.

Given roadblock #3 above, have decided to use the Flak 30 from the DML Sd.Kfz. 10/4 (1940) version.  An initial build of the base shows that the Flak 30 base is much smaller than the Flak 38 base and so will easily fit.  The 1940 version of the DML Sd.Kfz. 10/4 does not include a gun shield, only the 1939 version.  A test fit of the Tristar Flak 38 base shows that it will fit on the Sd.Kfz. 10/4 supports for the Flak 30 so hopefully can use the Flak 38 on the Sd.Kfz. 10/4, though also will have to check the clearance with the side screens.  Apparently, later versions of the Sd.Kfz. 10/4 were fitted with Flak 38s, so this hopefully is still reasonably historical.  

Wednesday, February 08, 2017

Saturday, December 17, 2016

Tamiya Tiger I Late WIP

This is the WIP Tamiya Tiger I Late with stick-on zimmerit.  Metal grills to be added later.


Sunday, December 04, 2016

DML King Tiger Henschel mit zimmerit WIP

Making a little progress on another long-standing project, the DML King Tiger Henschel turret with zimmerit.  Nice kit, but affixing the turret track hangers was a bit of a pain due to the lack of locating marks.  Plan is to finish as yellow-numbered KT of ss-s.pz.abt.101 in France August, 1944.


Some slow progress - getting close to painting the camo.


Sunday, November 13, 2016

Fw-190A-5 WIP


Hasegawa Fw-190A-5

First aircraft kit in over 30 years . . . remember doing the old Revell/Monogram Stuka 87B with the snake.  Big bird.

Purchased this kit from LHS a while back.  Started construction then was stymied for a couple of years while trying to figure out an appropriate solution to the seat belts.  Finally got a hold of the Fine Molds nano-aviation Luftwaffe seat belt set and have to say that the set seems great – easy to use, position and paint.  Affixed with white glue.

Couple of other modifications:  replace front wheels with True Details early Fw-190 wheel set.  Also accidently cracked canopy by stepping on it. L  Unfortunately, the canopy is the one part that can’t be repaired by simply gluing back together.  Without any aftermarket canopies in 1/32 scale, things seemed dark, but the Hasegawa Fw-190D-9 kit has both the normal and blown canopies, so ended buying that kit with the intent of scavenging the normal canopy from it to use for A-5, and, if and when built, using the blown canopy for the D-9.  Also, because the wheels need replacing and A-5 struts already have been built with the late model wheels but not yet assembled, maybe swap out the parts.

Some additional panel removal/scribing apparently is called for beyond what the instructions call out.  Also, seat apparently is wrong but too late to change the cockpit.

Colors:  using Vallejo Model Air RLM 74/75/76 with Tamiya Flat Yellow for theatre marking.  Did a little pre-shading.  Also using Tamiya XF-23 light blue as a base on the undersigned – much bluer and darker than Vallejo’s RLM 76 pale grey blue, but shouldn’t the underside be less faded from the sun?  Used Tamiya XF-75 Kure arsenal gray for wheel well and Tamiya XF-65 German Grey for cockpit interior base color.

What camo?  Want to do “European” RLM 74/75/76 camo, rather than greens of JG 54, but finding a nice match with decals (either kit decals or Alliance Model Works Bf-109 (!) decal set not so easy).

Also, will use Master Models Fw-190A early set of armament – although in reality is result of affixing cowl MGs too far forward (should have followed diagram in instructions) and concern that plastic parts will be destroyed in removal).  Many (most?) A-5s seemed to delete the outboard MG FF so may be will delete as well; in fact kit doesn’t seem to have the MG FF as part of the build (although the underwing bulges are there.

Thus:

Hasegawa ST 23 Fw-190A-5

Master Models Fw-190A armament

Fine Molds Luftwaffe seat belt set

True Details Fw-190 early wheel set


Wednesday, September 21, 2016

Panda Hobby Marder I WIP

Panda Hobby Marder I - work in progress.  Lots of small track links to assemble but a (straight) jig is provided.  We'll see how it goes.  (Update:  ditch the jig - the links will stick to it leaving a real problem when trying to extract the tracks from the jig.)  Added a MP 40 to interior.  No real references as to interior except some other models.  So far no real problems but need to dry fit a lot and trim some of the mating connections to make sure pieces fit.  Have the RPM kit on the shelf as well, but likely will stay there.  As indicated by the picture, there is no option for the driver's visor to be shown open, which is a little bit of a disappointment, although perhaps explained by the lack of any interior to the driver's compartment.

The fight compartment interior is a little spare, with just the radio, conduit and antenna (sans routing box or transformer) and a bunch of too-short Pak 40 rounds (maybe they used Kwk 40 rounds (75 x 495R, rather than 75 x 714R).  In addition to the MP 40, will replace the short rounds with some leftovers from the ICM 76.2 Pak kit and maybe the Tamiya Marder III brass ammo set.  Also courtesy of the same ICM kit are a few individual 75 mm round cases for the side ammo bins.  Maybe will include a couple of (water) jerry cans and crew kit items like MP40 pouches, helmets, water bottles, gas mask canisters, mess kits, etc.  On the exterior, reference photos show some Marders with a (German) jack on the right fender, so will scavenge a DML jack with brackets.  Of course, if there is jack, there should be a wooden jack block somewhere.  Haven't seen any photos of the same, but the only place where there seems to be enough room is the right rear of the lower hull.  Two other common and necessary items - fire extinguisher and gun cleaning rods.  One reference photo shows a fire extinguisher on the interior of the driver's compartment, but presumably there also was one in fighting compartment, so will probably stick in the left rear (similar to the placement in the SdKfz 251 series),  While the gun cleaning rods could fit on one of the interior side walls of the fighting compartment, current inclination is to attached to lower exterior of the fighting compartment with a shovel on the opposite side.  Also need to add a horn, notek blackout light and convoy light.


Jack, horn and notek light added.  May need to cut off rear end of exhaust to allow the exhaust shield to fit as there is insufficient room under the gun shield area.  Also added the PE shield supports and part of the gun travel lock.  The openings in the PE shield supports are smaller than the mating pins, which makes things messy.  Also, the base of the gun travel lock has locating pins . . . but the top of the hull does not have any mating openings, so beware.  Frankly, there are multiple parts where the mating pins are too large for the corresponding openings - it seems to be a recurring problem in this kit.


A comparison with the also-problematic Marder I H39 (Trumpeter) which also is WIP.  The location of the gun vis a vis the gun shield seems wrong but a ready fix is not obvious.