Monday, January 07, 2019

Panther D and T-34/76 Mod. 1943 with UZTM stamped turret


Two antagonists from the Russian Front - mid to late 1943 - Panther Ausf. D (slight conversion) and T-34 Mod. 1943 with UZTM turret and commander’s cupola (anachronistically referred to as “formochka”).


The size difference of the WIP afvs (both sans tracks) is shown above.

Panther Ausf. D (pre-June 1943 production)

On the heels of the Jagdpanther, this is the Pz.Beob.Wg. V Ausf. D Early from Dragon. As it turns out, the depicted vehicle never made it past the wooden mock-up stage, so decided to build as a regular Panther Ausf. D.  As far as I can tell from comparing part sprues, this kit contains all of the parts from Dragon’s Panther Ausf. D “Kursk,” except for the turret.  However, the difference in turrets appears to be certain locating holes, which can be filled as necessary.

After the Jagdpanther, would like to try to make this as OOB and simply as possible.  However, have made or plan to make a few minimal changes as follows:

1.         Engine decks grills:  (a) add P/E covers (Tamiya Panther Ausf. D add-ons); and (b) block the underside of the grills with plastic card and re-purposed Pz. IV fans from spare parts box.

2.         Exhaust – small cross bar in tube appears to be missing – a simple addition.

3.         Tracks – the kit unexpectedly comes with three sets of tracks: (a)  The “original” indy links on sprues without holes in the guide teeth; (b) set of DS tracks with holes in guide teeth; and (c) unadvertised set of Magic Tracks with holes in the guide teeth.  In addition, have another set of DS tracks from the Jagdpanther and a set of workable Tamiya Panther Ausf. D tracks (same as used for Jagdpanther build).  The original on-sprue indy links are a non-starter because of the lack of holes.  Have not has great experiences with DS tracks. Tried them twice – (i) DML Elephant, which broke; and (ii) Pz. III/IV tracks for Jagdpanzer IV(A), lacking sag.  Would be inclined to use the Magic Tracks or Tamiya workable tracks, except that side skirts may cover up lack of sag in which case DS might look okay and the indy links can be saved for another day where the sag is visible.

4.         Gun Barrel – according to some reviews, the kit 75mm gun barrel is 1mm too short.  It also is two-pieces, with resultant joint seam.  Have Tamiya metal barrel for Panther Ausf. D; may use here.

5.         Co-ax MG – as necessary, add (internal) barrel for co-ax MG.

6.         Missing top portion of gun mantlet/turret added; need to add small box (or boxes structure).

7.         Driver’s glass vision block added to open visor.

8.         Added second driving headlight (fortunately kit comes with two).

9.         Consider replacing chain on gun travel lock.

The initial build did not start well as the driver-side torsion bars were installed in the wrong directors.  The photo-based instructions in this regards are much worse than the Jagdpanther’s drawing-based instructions, but this is still (largely) a self-inflicted wound.  Of course, by the time the mistake was realized the glue had set so 4 or 5 bars had to be sheared off, meaning they will be weak and increasing the change of not being level (already a problem even without this). 

Note also that if the instructions sequence of adding the underside of the hull sponson before affixing the upper hull to the lower hull is followed, the underside pieces will have to fit under guide brackets on the lower hull, which will necessitate sliding the upper hull – except that the towing eyelets will prevent the hull front from fitting easily.  Ended up adding the undersides of the sponsons after the upper and rear hulls are fixed to the lower hull.

Inserted figure stands for driver and commander; in both cases from the Tamiya Wehrmacht Tank Crew Set.


T-34 Mod. 1943 with UZTM stamped turret and commander’s cupola.

Kit generally is going together well, except for the PE engine louvers.  It seemed simple enough but turned out to be a bit messy.  There was a small gap at the join between the front and lower hull that needed filling.  Installed a figure stand in the turret for a Russian Tank Crew Commander from Tamiya.  Also, the cast road wheels should be aligned with the rubber road wheels and idler/drive wheels, as the cast road wheels can be inserted closer to the hull, which would create a misalignment.


Tuesday, November 20, 2018

DML Jagdpanther with Zimmerit WIP - 2

Redid some of the camo and added some of the on-vehicle tools.  Still need to add rooftop periscopes, figures, tow cable, decals, weathering, etc., but getting a bit closer.


Temporary insertion of crew figures and fitting of tow cables.


Saturday, October 27, 2018

Mobelwagen

2 cm Flakvierling auf Fahrgestell Panzerkampfwagen IV aka Mobelwagen prototype.  Apparently, only 1 prototype of mounting the 2 cm Flakvierling was produced before the decision was made to mount the 3.7 cm. Flak 43 instead.  And possibly even that prototype was reconfigured to mount the 3.7 cm Flak 43.  The pictures of the prototype show no insignia, nor any camouflage, so it's a bid bland.  The vehicle itself also is pretty clean given that it was not in combat.

Anyway, starting to see the finish line.  Need to weather and try to get some contrast.


Wednesday, October 24, 2018

DML Jagdpanther G1 Early with Zimmerit WIP

The Dragon Jagdpanther G1 Early with Zimmerit has gone together very well.  The intention is build a vehicle of s.Pz.Jg.Abt. 654 in France, 1944.  The main modifications appear to be moving the on vehicle equipment on hull sides to the rear superstructure, engine deck and rear hull.


Tried Mission Model paints for the first time on this build.  Generally very good flow, although the Olivgrun had a little bit of clogging in the Tamiya superfine HG airbrush, which cleared later - probably shows in the pictures, so considering whether to redo:


Sunday, August 19, 2018

Tamiya Nostalgia


The NCO from the Tamiya Field Commander set reprising the NCO from the original Tamiya German Army Officer set (WIP).  Gw 41 on shoulder.


The originals, albeit the 1/25 scale version (w/better lighting).

 The "neu" four from the German Army Officer set.

Channeling the "alte" Kubelwagen/Schwimmwagen.

Wednesday, August 01, 2018

Tiger I Late with zimmerit WIP update

On the shelf but largely assembled and painted, but needs weathering.


Wednesday, July 18, 2018

(Very) Alte Tamiya Panther (Ausf. A)

The very old  Tamiya Panther Ausf. A has been sitting in its box for a long time (since the 1970s or 1980s).  It seemed that it would condemned to be there forever, as newer kits from Tamiya (Panther Ausf. G) and now Takom (Panther Ausf. A with zimmerit and interior).  However, on something of a lark, decided to do a quick build because, well, why not?  First thing was to double the middle road wheels - for this a derelict Tamiya Panther (motorized version) contributed the extra wheels needed.  The exhausts were drilled out, the solid supports replaced and an interior piece inserted.  Some pseudo-episcopes were added, as was a handle for the TC's hatch.  The return rollers were prepared using old Pz. IV return rollers.   The open sponsons were covered, although the big holes in the bottom still need to covered as well.  Not sure if worth it to invest in PE grills, new tracks (assuming they fit) and zimmerit, or just get started on the Takom kit, because even with the little "fixes" there are still dimensional issues (apparently).


a

Wednesday, June 20, 2018

Tamiya Sd. Kfz. 232 WIP

An older kit that still goes together pretty well - of course not the same detail as the newer AFV Club kits, but likely much easier and faster to assemble.  Replaced the 20mm KwK barrel with Lion Marc version.  Trying to find a figure that fits in the turret hatch under the bed frame antenna is a mild challenge because of the lack of clearance; provisionally using the top half of one of the members of Tamiya's tank crew at rest set.


Saturday, June 16, 2018

Vehicle crew

A  small take off on the old Tamiya Schwimmwagen or Kubelwagen box art using Tristar and Master Box figures.


Sample in situ placement in Kubelwagen and Horch.

Wednesday, May 30, 2018

LKW - ICM L3000S and Tamiya Opel Blitz

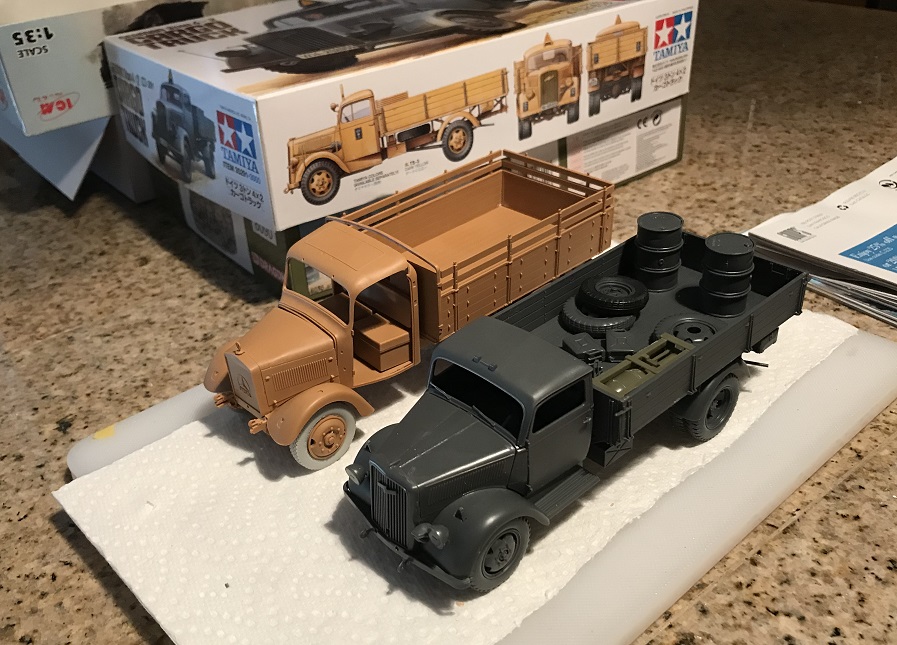
WIP pictures of the ICM Mercedes L3000S and Tamiya Opel Blitz.

The L3000S wheels are the Panzer Art LG3000 resin wheels, but on the front and inner rear wheels only the tire portion is used.

The ICM kit generally fit together impressively well - the only potential issue noted is the fitting the cab roof piece so that everything lines up.  Am hoping that it will hold in place when glued (after painting interior).  Have a little gap on the Opel Blitz hood as well, although that could be a builder issue.  Otherwise both kits were well engineered.  Have the Mig Productions tilt for the Opel Blitz, although undecided as to whether to use.  Per PMMS, have cut off the reinforced rear spring on the Opel Blitz to represent an early version (conforming to the six-lightening holes of the wheels).


Thursday, March 15, 2018

ICM s. and le. PKW WIP

Horch 108 and Stower Type 40.

This is the old version of the Kfz 1 by ICM, not the newly announced 2018 version.

The  Stower instructions are very imprecise and makes assembly, particularly of the chassis, more challenging than necessary.  The fit itself of the kit seems pretty good.

A few WIP pix.  The decals tends to disintegrate and the rear license plate is larger than the plastic base plate (!)


Inserted a driver figure, but probably very little will be visible (although plan to just use white glue to attach roof).  Fuel cans were replaced with Tamiya early versions.  Covered the headlamps with blackout covers.  Otherwise OOB.  Canvas cover base cover is Tamiya buff while base vehicle color is Tamiya german grey, lightened in various places.  Tires are Tamiya nato black.  Need to weather and do some detail painting, e.g., rear lights/distance indicator, and add additional decals.

Wednesday, February 28, 2018

DML Sd. kfz. 10/4 FlaK 30 WIP

Almost done with assembly and base painting.  Pays to go slow and dry/test fit everything as sequence of assembly can make the difference between some or a lot of grief later because lots of details within tight spaces.


Incremental progress with mock up of driver:


Sunday, February 11, 2018

A little bit of FlaK

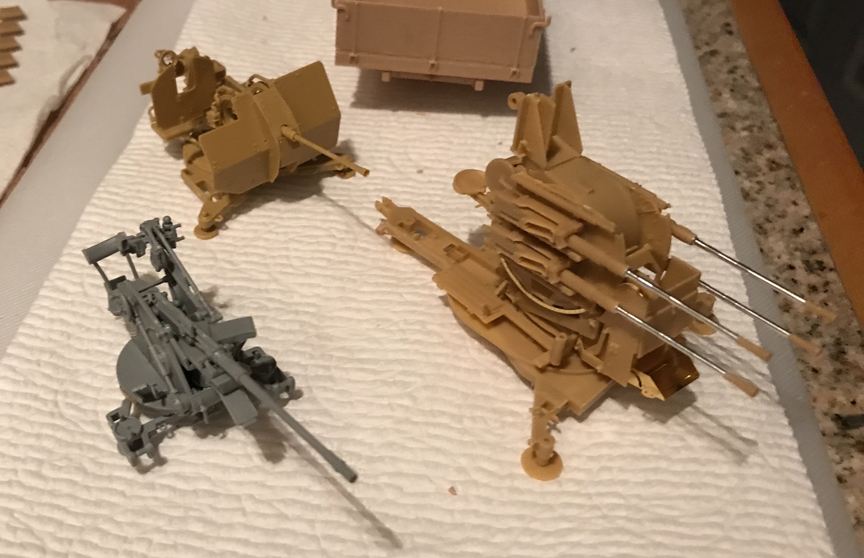
Picture of WIP Dragon Sd.Kfz. 10/4 (1940) with ammo trailer, and WIP Hobby Boss GAZ-AA with Tristar 20mm Flak 38 late, as well as a comparison picture of the Dragon 20mm Flak 30 with the Tristar.


The driver for the Sd.Kfz. 10/4 is a converted Luftwaffe passenger from the Tamiya Sd.Kfz.7.  Basically the legs were modified to fit in the driver's seat.  Not shown in the picture is the hood of a BA-20 from Ark Models.  This is the BA-20 kit with the incorrectly shaped rear panel.  The intent is to build a beute GAZ-AA converted to a Flak truck.  The picture shows the hood of what appears to be a BA-20 hanging in front of the engine grill as a ersatz armour plate.  The roof of the truck has been removed, leaving only the windshield (presumably to allow the Flak gun to have sufficient depression when facing forward).  The Flak gun appears to be a 20mm Flak 38, but with a modified shield - no shield for gun sight and modified gunner-side shield, without inner ribbing.  The sight appears to be the flakvisier 40, so the Tristar 20mm is in situ just for planning purposes - it will have to be replaced.


A bit more progress on the Sd.Kfz.10/4 - next to the Sd.Kfz. 253 which is being refurbished:


Lots of work, but getting closer to completing the sd kfz 10.4.  Instructions are a bit of a mess, however.  For example, the show the front tow hooks being added, but this will prevent the loading ramp assembly from being added later (the hooks are omitted from the later drawings).  Similarly, there are no instructions for assembling the screens in travel position - had to look at the DML Sd. Kfz. 10/5 instructions for the general idea of the same.  Also, MA1 is included in the PE fret, but not shown in the instructions - these pieces support the 20mm ammo crates on the sides of the screens - without which the crates are floating.  The driver's set storage bin is too high and prevents the gun platform from sitting flush on the fender, so that to be adjusted -with the surgery in the middle to maintain the general shape.  Fender placement of tools, rifle rack, etc., is quite imprecise, so reference to reference pix is important.   Decided to replace the kit windshield with an ersatz cover - which shouldn't be totally flat because of the windshield wiper mechanisms.  Also, if you are going to insert a driver, test fit before gluing seat, etc.  In this case, the legs have to go in with the seat as there isn't enough clearance otherwise.